

Thursday, February 20, 2020

Thursday, May 31, 2012
MVC.NET Advantage
- It provides the full control over rendered HTML scenario. There is provision of transparent separation of concerns SoC.
- Another big advantage is having the provision of test driven development (TDD).
- It’s very much easy in integrating the applications with other scripting frameworks like JavaScript.
- This technology uses the design and architecture of stateless web nature, and another advantage which makes an application more popular and traffic generating is using SEO techniques by MVC.NET framework.
- There are no ViewState and PostBack events in it that ensures the non-complexity nature of the application.
Saturday, April 28, 2012
What is Microsoft.Net Framework?
 The Microsoft.Net Framework is the window developer platform that connects the information, people, system and devices.
The .NET Framework is a development and execution environment that allows different programming languages and libraries to work together seamlessly to create Windows-based applications that are easier to build, manage, deploy, and integrate with other networked systems.
Built on Web service standards, .NET enables both new and existing personal and business applications to connect with software and services across platforms, applications, and programming languages. These connections give users access to key information, whenever and wherever you need it.
Microsoft .NET–connected software makes the "real-time" enterprise real by enabling information to flow freely throughout the organization, accessible to business partners, and delivering value to customers. With .NET-connected software, users can increase the value of existing systems and seamlessly extend those systems to partners, suppliers, and customers.
-
Connected
.NET Framework empowers developers to build applications that require robust messaging systems or flexible workflows.
-
Compelling
With the .NET Framework, developers and designers can collaborate to create rich user experiences.
-
Ubiquitous and Productive
The .NET Framework, including improvements like LINQ, provides a single platform to quickly build mobile desktop and server-based applications.
-
Easier installation of commercial applications
Many commercial applications from Microsoft and from third-party companies rely on the .NET Framework to support their core functionality. If you have the .NET Framework installed, commercial applications are easier to install.
-
Easier updates
After the .NET Framework is installed, it is updated automatically by the Microsoft Update service. If you receive Automatic Updates through Control Panel, any versions of the .NET Framework that are installed on the computer will always be up to date with the latest service packs.
- Comprehensive interoperability with existing code
- Complete and total language integration
- A common runtime engine shared by all .NET-aware languages
- A comprehensive base class library
- No more COM plumbing
The .NET Framework 3.5 provides the foundation for building connected and appealing applications, productively, on a wide variety of systems from the device to the data center, with the Deep integration of Language Integrated Query (LINQ) and data awareness and Web 2.0 AJAX. New classes in the base class library (BCL) for the .NET Framework 3.5 address the most common customer requests.
Window Presentation Foundation [WPF]
Windows Presentation Foundation (WPF) provides a unified framework for building applications and high-fidelity experiences in Windows Vista that blend together application UI, documents, and media content, while exploiting the full power of the computer.
Use a single WPF programming model to write code once and deploy it as a standalone installed application or in a browser.
WPF features include:
- XAML—A tools-supported, XML-based user interface design language that maps XML markup tags to objects in the .NET Framework, enabling designers and developers to collaborate on delivering superior user experiences.
- Open Document Specification—A cross-platform, open XML document format that helps customers effortlessly create, share, print, and archive paginated documents. Language Support.
Friday, June 3, 2011
To use the Excel object you must first set a COM reference to the Microsoft Excel Object Library which is an ActiveX component. Behind the scenes .NET uses the Interop.Excel DLL to talk to Excel. This DLL must be distributed with your application.
An issue exists with the Excel object when the user closes your application before closing the instance of Excel that you started. This instance becomes an orphaned process - i.e. when you look at the Processes tab in Windows Task Manager you will see a process exists for Excel.Exe yet there will be no visible Excel applications or windows present.
The VB.NET code below shows how to populate Excel and account for this scenario.
Module level variables in your form's Declarations section:
'
    ' Variables to refer to the Excel Object and process.
    '
    Private myExcel As Excel.Application
    Private myExcelPID As Integer
    Private myDataSet As DataSet
Start Excel and get its process ID:'
' Verify the Excel file to populate exists.
'
Dim strExcelFile As String = "C:\MyApp\MyExcel.xls"
If Not IO.File.Exists(strExcelFile) Then Return
'
' Start Microsoft Excel and make it visible.
'
myExcel = New Excel.Application
If myExcel Is Nothing Then
Throw (New Exception("Unable to Start Microsoft Excel."))
Else
myExcel.Visible = True
myExcel.WindowState = Excel.XlWindowState.xlMaximized
'
' Get the process ID of the Excel instance. This is used
' in the Closing Event to prevent orphaned Excel processes.
'
Dim aProcesses() As Process = Process.GetProcesses
Dim i As Integer
For i = 0 To aProcesses.GetUpperBound(0)
If aProcesses(i).MainWindowHandle.ToString = myExcel.Hwnd.ToString Then
myExcelPID = aProcesses(i).Id
Exit For
End If
Next
End If
Open the XLS file and activate the worksheet to populate:Dim strWorkSheetName As String = "MyData"
Dim sbExcelData As System.Text.StringBuilder
Dim aWorkbook As Excel.Workbook
Dim aWorkSheet As Excel.Worksheet
aWorkbook = myExcel.Workbooks.Open(strExcelFile)
aWorkSheet = CType(aWorkbook.Sheets(strWorkSheetName), Excel.Worksheet)
aWorkSheet.Activate()
Define the Excel Range to populate:'
' Assume the data to send to Excel is in a dataset and it has 5 columns
' and will fill Excel starting with column C and row 4.
'
Dim intRows As Integer = myDataSet.Tables("MyTable").Rows.Count - 1
Dim strRangeString As String = "C4:G" & intRows.ToString
Dim aRange As Excel.Range = aWorkSheet.Range(strRangeString)
'
' Remove any existing data from Excel.
'
aRange.ClearContents()
Convert the data in the dataset to a string to paste into Excel:If Not ConvertDataForExcel(sbExcelData) Then
Return
End If
Clipboard.SetDataObject(sbExcelData.ToString, False)
aRange.Select()
aWorkSheet.Paste()
'
' Unselect the range.
'
aRange = aWorkSheet.Range("A1:A1")
aRange.Select()
Convert the data to a TAB delimited string. The System.Text.StringBuilder is used for performance:Private Function ConvertDataForExcel( _
ByRef theExcelData As System.Text.StringBuilder) As Boolean
Try
Dim i As Integer
Dim adr As DataRow
Dim adt As DataTable = myDataSet.Tables("MyTable")
For Each adr In adt.Rows
For i = 0 to 4
'
' Convert the data and fill the string. Null values become blanks.
'
If adr(i) Is DBNull.Value Then
theExcelData.Append("")
Else
theExcelData.Append(adr(i).ToString)
End If
theExcelData.Append(vbTab)
Next
'
' Add a line feed to the end of each row.
'
theExcelData.Append(vbCrLf)
Next
Catch ex As Exception
' Display an error message.
Return False
End Try
End Function
Code to prevent orphaned Excel processes. First quit Excel then tell the InterOp layer to release the COM component:Private Sub Form1_Closing(ByVal sender As Object, _
ByVal e As System.ComponentModel.CancelEventArgs) Handles MyBase.Closing
Try
'
' Close Excel.
'
myExcel.Quit()
System.Runtime.InteropServices.Marshal.ReleaseComObject(myExcel);
Finally
myExcel = Nothing
'
' If this screen is closed before the Excel application
' there will be an orphan Excel process.
'
Try
'
' Look for an Excel process matching the one we started.
'
Dim aProcesses() As Process = Process.GetProcesses
Dim aProcess As Process
Dim i As Integer
For i = 0 To aProcesses.GetUpperBound(0)
If aProcesses(i).Id = myExcelPID Then
aProcess = aProcesses(i)
Exit For
End If
Next
Try
'
' If we found one see if it has exited.
'
If Not (aProcess Is Nothing) Then
If aProcess.ProcessName.ToUpper = "EXCEL" Then
If Not aProcess.HasExited Then
'
' It hasn't exited. If it has no main window we
' have an orphaned process that we should kill.
'
If aProcess.MainWindowHandle.ToString = "0" Then
aProcess.Kill()
Else
'
' The Excel process has a main window meaning
' the Excel file is still open. Tell the user to
' close Excel before closing this screen.
'
e.Cancel = True
MessageBox.Show( _
"Please close Excel before closing this screen.", _
"Warning", _
MessageBoxButtons.OK, MessageBoxIcon.Exclamation)
End If
End If
End If
End If
Catch
End Try
Catch ex As Exception
End Try
End Try
End Sub
Here is a similar sample written in C#. This code is encapsulated in a separate class. Examples on how to call use this class are shown at the bottom of this page. This code dynamically determines the Excel range to use by decoding the Tab delimited data string passed to it. It uses one worksheet to store data and a second worksheet to store the database query that produced the data that was stored.namespace iExcelClass
{
public class iExcel
{
private Excel.Application _mExcelApp;
private Excel.Workbook _mWorkbook;
private Excel.Worksheet _mWorkSheet;
private int _mintSheet1Row = 1;
private int _mintSheet2Row = 1;
private int _mExcelPID = 0;
private bool _mblnExcelVisible = false;
private string _mstrXLSFileFullName = "";
private string _mstrWorkSheetName = "MyWkShtName";
public iExcel()
{
}
public void StartExcel(string XLSFileFullName)
{
//
// Start Microsoft Excel, make it visible, add a worksheet.
//
_mExcelApp = new Excel.Application();
if (_mExcelApp == null)
{
throw (new Exception("Unable to Start Microsoft Excel."));
}
_mstrXLSFileFullName = XLSFileFullName;
_mExcelApp.Visible = _mblnExcelVisible;
_mExcelApp.WindowState = Excel.XlWindowState.xlMinimized;
_mWorkbook = _mExcelApp.Workbooks.Add(Excel.XlWBATemplate.xlWBATWorksheet);
_mWorkSheet = (Excel.Worksheet) _mWorkbook.Worksheets.Add(
Type.Missing,
Type.Missing,
Type.Missing,
Type.Missing);
_mWorkSheet.Name = _mstrWorkSheetName;
_mExcelApp.SheetsInNewWorkbook = 1;
_mWorkSheet.Activate();
//
// Get the Excel instance's process ID...used later
// to prevent orphaned Excel processes.
//
Process [] aProcesses = Process.GetProcesses();
for (int i = 0; i <= aProcesses.GetUpperBound(0); i++)
{
if (aProcesses[i].MainWindowHandle.ToString() == _mExcelApp.Hwnd.ToString())
{
_mExcelPID = aProcesses[i].Id;
break;
}
}
}
public void AddRow(string TabDelimitedData)
{
//
// Decipher the input string's characteristics to calculate the
// Excel Range to paste it into.
//
string [] cols = TabDelimitedData.Split('\t');
if (cols.Length == 0)
{
return;
}
int i = 1;
string strCol = "";
while(i * 26 <= cols.Length)
{
i++;
}
if (i == 1)
{
strCol = Convert.ToChar(64 + cols.Length).ToString();
}
else
{
strCol = Convert.ToChar(64 + i - 1).ToString();
strCol += Convert.ToChar(64 + cols.Length - ((i-1)*26)).ToString();
}
string strRangeString =
"A" + _mintSheet1Row.ToString() + ":" + strCol + _mintSheet1Row.ToString();
//
// Define the Range, clear it, paste the data.
//
Excel.Range _mRange = _mWorkSheet.get_Range(strRangeString, Type.Missing);
_mRange.ClearContents();
_mRange.Select();
Clipboard.SetDataObject(TabDelimitedData, false);
_mWorkSheet.Paste(Type.Missing, Type.Missing);
//
// Unselect the range.
//
_mRange = _mWorkSheet.get_Range("A1:A1", Type.Missing);
_mRange.Select();
_mintSheet1Row++;
}
public void AddQueryDetails(string TabDelimitedData)
{
Excel.Worksheet _WorkSheet = ((Excel.Worksheet) _mWorkbook.Sheets[2]);
_WorkSheet.Name = "Query Details";
_WorkSheet.Activate();
//
// Decipher the input string's characteristics to calculate the
// Excel Range to paste it into.
//
string [] cols = TabDelimitedData.Split('\t');
if (cols.Length == 0)
{
return;
}
string strCol = Convert.ToChar(64 + cols.Length).ToString();
string strRangeString =
"A" + _mintSheet2Row.ToString() + ":" + strCol + _mintSheet2Row.ToString();
//
// Define the Range, clear it, paste the data.
//
Excel.Range _Range = _WorkSheet.get_Range(strRangeString, Type.Missing);
_Range.ClearContents();
_Range.Select();
Clipboard.SetDataObject(TabDelimitedData, false);
_WorkSheet.Paste(Type.Missing, Type.Missing);
//
// Unselect the range.
//
_Range = _WorkSheet.get_Range("A1:A1", Type.Missing);
_Range.Select();
_mintSheet2Row++;
}
public void SaveFile()
{
//
// Overwrite existing XLS file without alerting the user.
//
_mExcelApp.DisplayAlerts = false;
_mExcelApp.ActiveWorkbook.SaveAs(
_mstrXLSFileFullName,
Excel.XlFileFormat.xlXMLSpreadsheet,
Type.Missing,
Type.Missing,
Type.Missing,
Type.Missing,
Excel.XlSaveAsAccessMode.xlNoChange,
Type.Missing,
Type.Missing,
Type.Missing,
Type.Missing,
Type.Missing);
}
public void CloseExcel()
{
try
{
//
// Close the Excel application.
// Tell the stupid interop layer to release the object.
//
_mExcelApp.Quit();
System.Runtime.InteropServices.Marshal.ReleaseComObject(_mExcelApp);
}
finally
{
//
// Prevent an orphaned Excel process by forcibly killing it.
//
_mExcelApp = null;
Process [] aProcesses = Process.GetProcesses();
Process aProcess = null;
try
{
//
// Look for an Excel process matching the one we started.
//
for (int i = 0; i <= aProcesses.GetUpperBound(0); i++)
{
if (aProcesses[i].Id == _mExcelPID)
{
aProcess = aProcesses[i];
break;
}
}
try
{
//
// If we found a matching Excel proceess with no main window
// associated main window, kill it.
//
if (aProcess != null)
{
if (aProcess.ProcessName.ToUpper() == "EXCEL")
{
if (!aProcess.HasExited)
{
if (aProcess.MainWindowHandle.ToString() == "0")
{
aProcess.Kill();
}
else
{
//
// The Excel process has a main window meaning the Excel
// file is still open. Tell the user to close Excel.
//
MessageBox.Show("Please close Excel before closing this screen.",
"Warning", MessageBoxButtons.OK, MessageBoxIcon.Exclamation);
}
}
}
}
}
catch {}
}
catch {}
}
}
//
// Public Properties
//
public string XLSFileFullName
{
get { return _mstrXLSFileFullName; }
}
public string WorkSheetName
{
get { return _mstrWorkSheetName; }
set { _mstrWorkSheetName = value; }
}
public bool ExcelVisible
{
get { return _mblnExcelVisible; }
set { _mblnExcelVisible = value; }
}
}
}
> Sample Calls:iExcelClass.iExcel oExcel = new iExcelClass.iExcel();
oExcel.WorkSheetName = "MyWorkSheet";
oExcel.ExcelVisible = false;
oExcel.StartExcel(@"C:\...\MyXLSFile.xls");
//
// Add a rows of data to Excel. Datastring is a Tab delimited string
// such as: "aaa\tbbb\tccc"
//
for ...
{
oExcel.AddRow(DataString);
}
//
// Add details of the query that produced the data to a second worksheet.
//
oExcel.AddQueryDetails("Date Run\tDatabase Name\tQuery Run");
oExcel.AddQueryDetails("06-01-2004\tProduction\tSelect * FROM Table1");
oExcel.SaveFile();
oExcel.CloseExcel();
Saturday, April 9, 2011
Thursday, January 13, 2011
ASP.NET AJAX provides the power of asynchronous JavaScript and XML to your web sites. AJAX makes web pages more responsive and interactive by reducing page refreshes or postbacks. It harnesses the power of client-side JavaScript and the XML HTTP object to provide these features.
Although AJAX is essentially a client-side technique, most of its real-world deployments call for server-side processing. Most commonly, the data manipulated by your web site will reside in some RDBMS on the server. To make AJAX really useful, you need an easy and robust way to deal with this server-side data. Fortunately, ASP.NET AJAX provides a sound infrastructure for doing just that. AJAX communication happens between your browser and the server over the Internet. Naturally, web services can play a significant role in data transport and overall communication between the client and the server. This article shows how ASP.NET AJAX can consume ASP.NET web services.
Software Requirements
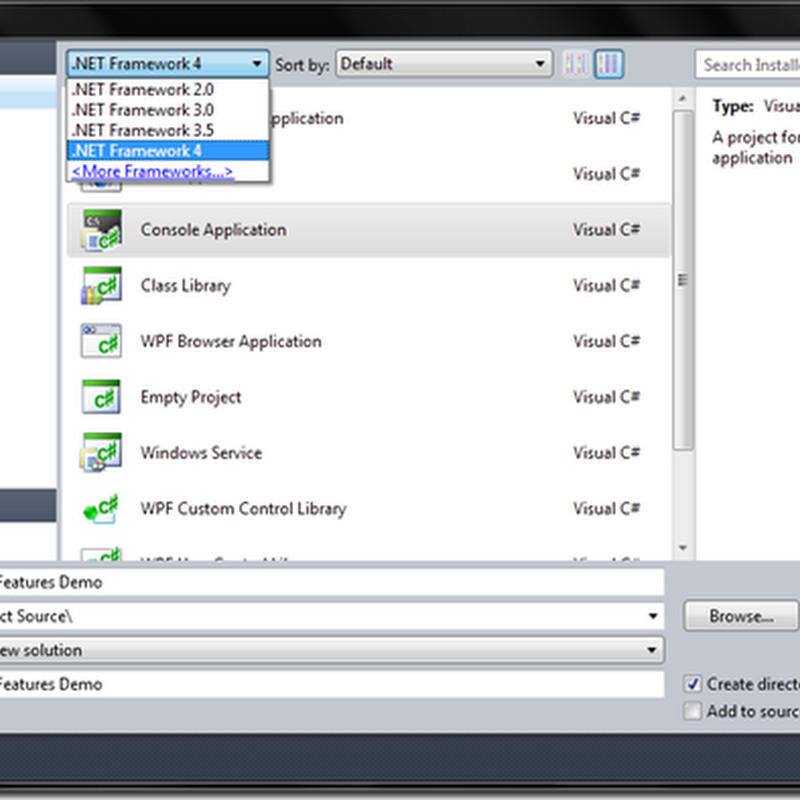
All the examples in this article are developed using the RC build of ASP.NET AJAX that you can download from ajax.asp.net. Moreover, you need to have SQL Server 2005 (Express Edition will do) with the Northwind database installed. The examples use Visual Studio 2005 as the IDE.Example Scenario
The example develops a web form that acts as a data entry page for an Employees table of the Northwind database. Using ASP.NET AJAX features, this data entry page will consume a web service that allows you to SELECT, INSERT, UPDATE, and DELETE employees.Creating the Web Service

Figure 1: The New Web Site Dialog with Added Templates
A web site created using the "ASP.NET AJAX Enabled Web Site" template is different from a normal web site in the following ways:
- It has a web.config file with a lot of ASP.NET AJAX-specific configuration information.
- It refers System.Web.Extensions assembly.
Now that you have created a new web site, add a new web service to it and name it EmployeeService.asmx. The EmployeeService will contain five web methods (see Table 1).
| Method Name | Description |
|---|---|
| GetEmployees() | Returns a list of employees from the Employees table. The list is returned in the form of an array of Employee objects. |
| GetEmployee() | Accepts an EmployeeID and returns its details as an Employee object. |
| Insert() | Adds a new employee to the Employees table. |
| Update() | Updates an existing employee from the Employees table. |
| Delete() | Deletes an existing employee from the Employees table. |
The GetEmployees() and GetEmployee() methods return data in the form of Employee object(s). Therefore, you first need to create a class called Employee. Right-click the App_Code folder of your web site and choose "Add New Item...". Add a new class called Employee. The following is the complete code that makes the Employee class:
public class Employee
{
   private int intEmployeeID;
   private string strFirstName;
   private string strLastName;
   public int EmployeeID
   {
      get
      {
         return intEmployeeID;
      }
      set
      {
         intEmployeeID = value;
      }
   }
   public string FirstName
   {
      get
      {
         return strFirstName;
      }
      set
      {
         strFirstName = value;
      }
   }
   public string LastName
   {
      get
      {
         return strLastName;
      }
      set
      {
         strLastName = value;
      }
   }
}
The Employee class declares three provate variables for storing employee ID, first name, and last name, respectively. The three variables are wrapped inside three public properties: EmployeeID, FirstName, and LastName.Open the web.config file and add a <connectionStrings> section as follows:
<connectionStrings>
   <add name="connstr" connectionString=
        "data source=.\sqlexpress;
        initial catalog=northwind;
        integrated security=true"/>
</connectionStrings>
This stores a database connection string that points to the Northwind database. Make sure to change SQL Server name/IP and authentication details to match your environment.Now, open EmployeeService.cs and add the following code:
private string strConn =
   "";
public EmployeeService()
{
   strConn = ConfigurationManager.ConnectionStrings["connstr"].
             ConnectionString;
}
The code uses the ConfigurationManager class to read the connection string from the config file and stores it in a class-level variable called strConn. This variable is used further by all the other web methods.Now, add the GetEmployees web method as follows:
[WebMethod]
public Employee[] GetEmployees()
{
   SqlConnection cnn = new SqlConnection(strConn);
   cnn.Open();
   SqlCommand cmd            = new SqlCommand();
   cmd.Connection            = cnn;
   cmd.CommandText           = "select employeeid,firstname,
                                lastname from employees";
   SqlDataReader reader      = cmd.ExecuteReader();
   List<Employee> list = new List<Employee>();
   while (reader.Read())
   {
      Employee emp   = new Employee();
      emp.EmployeeID = reader.GetInt32(0);
      emp.FirstName  = reader.GetString(1);
      emp.LastName   = reader.GetString(2);
      list.Add(emp);
   }
   reader.Close();
   cnn.Close();
   return list.ToArray();
}
The code creates new SqlConnection and SqlCommand objects. It then executes a SELECT query and fetches EmployeeID, FirstName, and LastName columns from the Employees table. The results are retrieved as SqlDataReader instances. Then, a generic-based List of Employee objects is created. A while loop iterates through the SqlDataReader. With each iteration, a new Employee object is created and its EmployeeID, FirstName, and LastName properties are set. The Employee object then is added to the List. After the while loop completes, SqlDataReader and SqlConnection are closed. The return type of the GetEmployees() web method is an array of Employee objects. Hence, the generic List is converted into Employee array using the ToArray() method of the List class[WebMethod]
public Employee GetEmployee(int pEmployeeId)
{
SqlConnection cnn = new SqlConnection(strConn);
cnn.Open();
SqlCommand cmd = new SqlCommand();
cmd.Connection = cnn;
cmd.CommandText = "select employeeid,firstname,lastname
from employees where employeeid=@id";
SqlParameter id = new SqlParameter("@id", pEmployeeId);
cmd.Parameters.Add(id);
SqlDataReader reader = cmd.ExecuteReader();
Employee emp = new Employee();
while (reader.Read())
{
emp.EmployeeID = reader.GetInt32(0);
emp.FirstName = reader.GetString(1);
emp.LastName = reader.GetString(2);
}
reader.Close();
cnn.Close();
return emp;
}The GetEmployee() web method accepts an employee ID that is to be returned. The code is very similar to the previous code but this time it fetches only one employee. Note that you used SqlParameter to represent the passed EmployeeID.Now you can add the Insert(), Update(), and Delete() web methods as follows:
[WebMethod]
public int Insert(string pFirstName, string pLastName)
{
   SqlConnection cnn  = new SqlConnection(strConn);
   cnn.Open();
   SqlCommand cmd     = new SqlCommand();
   cmd.Connection     = cnn;
   cmd.CommandText    = "insert into employees(firstname,lastname)
                         values (@fname,@lname)";
   SqlParameter fname = new SqlParameter("@fname", pFirstName);
   SqlParameter lname = new SqlParameter("@lname", pLastName);
   cmd.Parameters.Add(fname);
   cmd.Parameters.Add(lname);
   int i = cmd.ExecuteNonQuery();
   cnn.Close();
   return i;
}
[WebMethod]
public int Update(int pEmployeeId,string pFirstName, string pLastName)
{
SqlConnection cnn = new SqlConnection(strConn);
cnn.Open();
SqlCommand cmd = new SqlCommand();
cmd.Connection = cnn;
cmd.CommandText = "update employees set firstname=@fname,
lastname=@lname where employeeid=@id";
SqlParameter fname = new SqlParameter("@fname", pFirstName);
SqlParameter lname = new SqlParameter("@lname", pLastName);
SqlParameter id = new SqlParameter("@id", pEmployeeId);
cmd.Parameters.Add(fname);
cmd.Parameters.Add(lname);
cmd.Parameters.Add(id);
int i = cmd.ExecuteNonQuery();
cnn.Close();
return i;
}[WebMethod]
public int Delete(int pEmployeeId)
{
SqlConnection cnn = new SqlConnection(strConn);
cnn.Open();
SqlCommand cmd = new SqlCommand();
cmd.Connection = cnn;
cmd.CommandText = "delete from employees where employeeid=@id";
SqlParameter id = new SqlParameter("@id", pEmployeeId);
cmd.Parameters.Add(id);
int i = cmd.ExecuteNonQuery();
cnn.Close();
return i;
}The Insert() web method accepts the first name and last name of the employee to be added. It then creates an instance each of SqlConnection and SqlCommand and executes the INSERT statement using the ExecuteNonQuery() method of the SqlCommand object. Similarly, the Update() web method accepts the employee ID to be updated, along with new values for first name and last name, and fires an UPDATE statement. Finally, the Delete() web method accepts an employee ID that is to be deleted and fires a DELETE statement.This completes your web service. To this point, you have not done anything specific to AJAX functionality. Now, it's time to do just that. Modify your web service class definition as follows:
using System.Web.Script.Services;
...
...
[WebService(Namespace = "http://tempuri.org/")]
[WebServiceBinding(ConformsTo = WsiProfiles.BasicProfile1_1)]
[ScriptService]
public class EmployeeService : System.Web.Services.WebService
{
   ...
   ...
Notice the lines marked in bold. You have imported a namespace System.Web.Script.Services, which comes from the System.Web.Extensions assembly. The [ScriptService] attribute you'll use later is supplied by this namespace. The [ScriptService] attribute enables the web service to be called from the client-side JavaScript (i.e., ASP.NET AJAX).That's it! You are now ready to consume your web service from ASP.NET AJAX.
How to Consume the Web Service
In this section, you will create a web form that acts as a data entry page for the Employees table by consuming the web service you just created. To begin, add a new web form called EmployeeServiceClient.aspx to the web site. Open the toolbox by selecting the View > Toolbox menu option. On the toolbox, locate a node titled AJAX Extensions (see Figure 2).
Figure 2: The New Web Site Dialog with Added Templates
The AJAX Extensions node displays all the ASP.NET AJAX components that you can use on a web form. Drag and drop a ScriptManager component on the web form. Every web form making use of ASP.NET AJAX needs one ScriptManager component. Open the properties window for the ScriptManager. Locate its Services property and open the Service Reference collection editor as shown in Figure 3.

Click here for a larger image.
Figure 3: The Service Reference Collection Editor Click the Add button at the bottom of the dialog and set the Path property to the virtual path of the web service (in other words, EmployeeService.asmx). This will generate the following markup in the web form file:
<asp:ScriptManager ID="ScriptManager1" runat="server" >
   <Services>
      <asp:ServiceReference Path="EmployeeService.asmx" />
   </Services>
</asp:ScriptManager>
For each web service that you want to consume, you need one <asp:ServiceReference> element inside the <asp:ScriptManager> section. The <asp:ServiceReference> tag registers a web service to use in the current web form.Now, design the web form as shown in Figure 4.

Figure 4: Design the Web Form
The web form consists of a dropdown (<SELECT>) that lists all the existing employee IDs. Once you select a specific ID, details of that employee are displayed in the two textboxes. You then can update them. To add an employee, you simply need to enter the first name and last name and click the Insert button. Similarly, you can delete an employee by selecting employee ID in the dropdown and clicking the Delete button. A success or failure message is displayed once the INSERT, UPDATE, or DELETE operation is over. The following is the complete markup of the web form:
<table>
   <tr>
      <td colspan="2">
         <asp:Label ID="Label4" runat="server" Font-Size="X-Large"
                    Text="Employee Management">
         </asp:Label></td>
   </tr>
   <tr>
      <td style="width: 100px">
         <asp:Label ID="Label1" runat="server"
                    Text="Employee ID :"></asp:Label></td>
      <td style="width: 100px">
         <select id="Select1" >
         </select>
      </td>
   </tr>
   <tr>
      <td style="width: 100px">
         <asp:Label ID="Label2" runat="server"
                    Text="First Name :"></asp:Label></td>
      <td style="width: 100px">
         <input id="Text1" type="text" /></td>
   </tr>
   <tr>
      <td style="width: 100px">
         <asp:Label ID="Label3" runat="server"
                    Text="Last Name :"></asp:Label></td>
      <td style="width: 100px">
         <input id="Text2" type="text" /></td>
   </tr>
   <tr>
      <td align="center" colspan="2">
         <input id="Button3" type="button" value="Insert" />
         <input id="Button4" type="button" value="Update" />
         <input id="Button5" type="button" value="Delete" />
      </td>
   </tr>
   <tr>
      <td align="center" colspan="2">
         <span id="lblMsg" style="font-weight: bold;
               color: red;"></span>
      </td>
   </tr>
</table>Notice one important thing: You did not use ASP.NET server controls such as DropDownList, TextBox, and Button. Instead, you used traditional HTML controls such as <SELECT> and <INPUT>. This is because you want to call your web service from client-side JavaScript and not from server-side code. Also, notice the <SPAN> tag at the bottom. It will be used for displaying success or failure messages.Next, add a <script> section inside the <head> HTML element. Add a function called CallWebMethod() as shown below:
function CallWebMethod(methodType)
{
   switch(methodType)
   {
      case "select":
         EmployeeService.GetEmployees(FillEmployeeList,ErrorHandler,
                                      TimeOutHandler);
         break;
      case "selectone":
         var select=document.getElementById("Select1");
         var empid=select.options[select.selectedIndex].value;
         EmployeeService.GetEmployee(empid,DisplayEmployeeDetails,
                                     ErrorHandler,TimeOutHandler);
         break;
      case "insert":
         var text1=document.getElementById("Text1");
         var text2=document.getElementById("Text2");
         EmployeeService.Insert(text1.value,text2.value,
                                InsertEmployee,ErrorHandler,
                                TimeOutHandler);
         break;
      case "update":
         var select=document.getElementById("Select1");
         var empid=select.options[select.selectedIndex].value;
         var text1=document.getElementById("Text1");
         var text2=document.getElementById("Text2");
         var emp=new Employee();
         emp.EmployeeID=empid;
         emp.FirstName=text1.value;
         emp.LastName=text2.value;
         EmployeeService.Update(empid,text1.value,text2.value,
                                UpdateEmployee,ErrorHandler,
                                TimeOutHandler);
         break;
      case "delete":
         var select=document.getElementById("Select1");
         var empid=select.options[select.selectedIndex].value;
         EmployeeService.Delete(empid,DeleteEmployee,ErrorHandler,
                                TimeOutHandler);
         break;
   }
}
The CallWebMethod() function is a central function that makes calls to the web service. The function accepts a string parameter indicating the method to be called and then calls that method. It contains a switch statement that checks off the method to be called. Each case block calls one web method. Notice how the web method has been called. The ASP.NET AJAX framework automatically creates a JavaScript proxy class for the web service. The proxy class has the same name as the web service. So, the EmployeeService in the above code is not the actual web service class but a JavaScript proxy class. The proxy contains all the web methods of the original web service. In addition to the original web method parameters, each method can have three extra parameters.The first extra parameter is a JavaScript function that should be called when the web method call is successfully completed. Remember that any AJAX communication between client and server is asynchronous. Hence, this function is necessary to capture the return value of the web method. The second parameter is a JavaScript function that is called in the event of error. Finally, the third extra parameter is a JavaScript function that is called if a timeout occurs during the web method call.
In the first case ("select"), you simply call the GetEmployees() method. In the second case ("selectone"), you call the GetEmployee() method. The employee ID is picked up from the dropdown using traditional JavaScript code. Similarly, the third, fourth, and fifth case blocks call the Insert(), Update(), and Delete() methods, respectively.
The above code uses five JavaScript functions that are called when the respective web method calls are successful: FillEmployeeList(), DisplayEmployeeDetails(), InsertEmployee(), UpdateEmployee(), and DeleteEmployee(). Each of these functions accepts a single parameter that represents the return value of the corresponding web method:
function FillEmployeeList(result)
{
   var select=document.getElementById("Select1");
   for(var i=0;i<result.length;i++)
   {
      var option=new Option(result[i].EmployeeID,
                            result[i].EmployeeID);
      select.options.add(option);
   }
}
function DisplayEmployeeDetails(result)
{
   var text1=document.getElementById("Text1");
   var text2=document.getElementById("Text2");
   text1.innerText=result.FirstName;
   text2.innerText=result.LastName;
   var lblMsg=document.getElementById("lblMsg");
   lblMsg.innerText="";
}
function InsertEmployee(result)
{
   if(result>0)
   {
      var lblMsg=document.getElementById("lblMsg");
      lblMsg.innerText="Employee added successfully!";
   }
   else
   {
      var lblMsg=document.getElementById("lblMsg");
      lblMsg.innerText="Error occurred while adding new employee!";
   }
}
function UpdateEmployee(result)
{
   if(result>0)
   {
      var lblMsg=document.getElementById("lblMsg");
      lblMsg.innerText="Employee updated successfully!";
   }
   else
   {
      var lblMsg=document.getElementById("lblMsg");
      lblMsg.innerText="Error occurred while updating the employee!";
   }
}
function DeleteEmployee(result)
{
   if(result>0)
   {
      var lblMsg=document.getElementById("lblMsg");
      lblMsg.innerText="Employee deleted successfully!";
   }
   else
   {
      var lblMsg=document.getElementById("lblMsg");
      lblMsg.innerText="Error occurred while deleting employee!";
   }
}
The FillEmployeeList() function receives an array of Employee objects as a parameter. Recollect that your GetEmployees() web method returns an array of Employee objects. It then iterates through the array. With each iteration, a new OPTION element is created and added to the dropdown (in other words, <SELECT>). The DisplayEmployeeDetails() function receives an Employee object containing details about an employee. It simply displays those details in the two textboxes. The InsertEmployee(), UpdateEmployee(), and DeleteEmployee() functions receive an integer indicating the number of records affected by the INSERT, UPDATE, and DELETE operations, respectively. A result greater than zero indicates success and they display a success message in the <SPAN> tag. Otherwise, they display an error message. When your page is displayed for the first time, you need to populate the dropdown list with the existing employee IDs. This is done by calling the CallWebMethod() method in a special function named pageLoad():function pageLoad()
{
CallWebMethod("select");
}
Saturday, October 2, 2010
Injecting Client-Side Script from an ASP.NET Server Control
Scott Mitchell
August 2003
Applies to:
Microsoft® ASP.NET
Prerequisites: This article assumes the reader is familiar with ASP.NET.
Level of Difficulty: 2
Summary: While, technically, all of an ASP.NET server control's functionality can be performed on the server-side, often the usability of a server control can be greatly enhanced by adding client-side script. In this article we'll examine two means by which server controls can emit client-side script. We'll also build two server controls that utilize these techniques: PopupGreeting, a server control that displays a client-side, modal dialog box with a specified message on a Web page's first load, and ConfirmButton, which is an enhanced Button Web control that, when clicked, prompts the user with a JavaScript confirm() dialog box before posting back the Web Form. (11 printed pages)
Download InjectingClientSideScript.msi.
Contents
Introduction
Adding Client-Side Script Blocks with RegisterStartupScript() and RegisterClientScriptBlock()
Examining IsStartupScriptRegistered() and IsClientScriptBlockRegistered()
Emitting Client-Side Script Blocks from an ASP.NET Server Control
Emitting HTML Attributes for a ASP.NET Server Web Control
Conclusion
Introduction
While, technically, all of a Microsoft® ASP.NET server control's functionality can be performed on the server-side, often the usability of a server control can be greatly enhanced by adding client-side script. For example, the ASP.NET validation Web controls perform all validation checks on the server-side. However, for uplevel browsers, the validation Web controls also emit client-side script so that validation can be performed on the client-side as well. This means that users of those browsers get a more responsive, dynamic experience.
When developing ASP.NET server controls you should ask yourself how you could enhance the usability through the use of client-side script. Once you have identified these areas, all that remains is to augment the server control so that it emits the proper client-side script.
There are two types of client-side script ASP.NET server controls can emit:
- Client-side script blocks
- Client-side HTML attributes
Client-side script blocks are typically written in JavaScript, and usually contain functions that are executed when certain client-side events transpire. Client-side HTML attributes provide a way to tie a client-side event with a piece of client-side script. For example, the following HTML page contains a client-side script block that contains a function called doClick(). The page also contains a button—created by the <input> HTML element—that has its onclick attribute wired up to the doClick() function. That is, whenever a user clicks the button, the client-side code in the doClick() function will execute. In this example, a popup dialog box will display (Figure 1).
<html>
  <body>
    <form>
      <script language="JavaScript">
      <!--
         function doClick() {
            alert("You clicked me!");
         }
      // -->
      </script>

      <input type="button" onclick="doClick()" value="Click Me!" />
    </form>
  </body>
</html>
Figure 1 shows a screenshot of this HTML page when the Click Me! button is clicked.
.gif")
Figure 1. Popup dialog box that displays when Click Me! Button is clicked
There are a couple of things worth mentioning in the client-side script in the HTML page above. First, note that the client-side script block is encased in HTML comments (<!-- and -->). These comments are in place because old, non-script aware browsers will simply display the contents of the <script> block if it is not encased in HTML comments. Furthermore, note that the closing HTML comment in the script block has a JavaScript comment preceding it—//. This is because older versions of Netscape would throw a JavaScript parsing exception when the --> was encountered, unless it was commented out. Fortunately, modern browsers do not require this extra pampering, so if you are developing Web pages for an intranet or other browser-controlled environment, you need not take such precautions.
For those unfamiliar with client-side scripting, the alert(string) function simply displays a modal popup dialog box that contains the message specified by the string parameter. HTML elements all have a number of client-side attributes (such as onclick, onmouseover, onmouseout, onfocus, onblur, and so on) that can be assigned a piece of client-side JavaScript code. For example, in the HTML page above, the <input> element's onclick attribute is wired up to the doClick() function, thereby causing the doClick() function to execute when the button is clicked. A list of JavaScript events and their associated HTML attributes can be found in the article Introduction to Dynamic HTML. For more information on client-side JavaScript, refer to the article HTML and Dynamic HTML.
In this article we will see how to emit both client-side script blocks and HTML element attributes in ASP.NET server controls. First, we'll see how to use two methods in the System.Web.UI.Page class to add client-side script blocks to an ASP.NET Web page: RegisterStartupScript() and RegisterClientScriptBlock(). Armed with this knowledge, we'll examine building a simple server control that displays a client-side popup dialog box whenever the page is loaded. After this, we'll turn our attention to adding HTML attributes to the HTML element rendered by the ASP.NET server control. Finally, we'll put all that we've learned to practice and build a ConfirmButton Web control—one that, when clicked, prompts the user with a client-side confirm dialog box that asks if they are sure they want to proceed.
Adding Client-Side Script Blocks with RegisterStartupScript() and RegisterClientScriptBlock()
The System.Web.UI.Page class contains two methods for emitting client-side script code into the HTML rendered by the ASP.NET Web page:
- RegisterStartupScript(key, script)
- RegisterClientScriptBlock(key, script)
Both of these methods take two strings as input. The second parameter, script, is the client-side script—including the opening and closing <script> tags—to insert into the page. The first parameter, key, serves as a unique identifier for the inserted client-side script.
The only difference between these two methods is where each one emits the script block. RegisterClientScriptBlock() emits the script block at the beginning of the Web Form (right after the <form runat="server"> tag), while RegisterStartupScript() emits the script block at the end of the Web Form (right before the </form> tag).
To better understand why there are two different methods for emitting client-side script, realize that client-side script can be partitioned into two classes: code that is designed to run immediately when the page is loaded, and code that is designed to run when some client-side event occurs. A common example of code that is designed to run when the page is loaded is client-side code designed to set the focus to a textbox. For example, when you visit Google, a small bit of client-side code is executed when the page is loaded to automatically set the focus to the search textbox.
An example of code that is designed to run in response to a client-side event can be seen below. Specifically, in this example, a popup dialog box displays when a button is clicked:
<html>
  <body>
    <form>
      <script language="JavaScript">
      <!--
        function displayPopup() {
            alert("Hello, world.");
        }
      // -->
      </script>

      <input type="button" value="Click Me!" onclick="displayPopup()" />
    </form>
  </body>
</html>
Here, the onclick="displayPopup()" in the <input> tag indicates that when the button is clicked the JavaScript function displayPopup() should run.
The RegisterStartupScript() method is useful for adding script blocks that are designed to run when the page is loaded. The script blocks added via this method appear at the end of the Web Form because the HTML element the script modifies must be defined prior to the script running. That is, if you want to use client-side script to set the focus to a textbox, you must make certain that the textbox's HTML markup appears before the script that sets the textbox's focus. For example, the following HTML will display a textbox and set the focus to the textbox:
<input type="text" id="myTextBox" />

<script language="JavaScript">
<!--
   document.getElementById("myTextBox").focus();
// -->
</script>
Whereas the following HTML will not set the focus to the textbox, because the textbox is defined after the script block:
<script language="JavaScript">
<!--
   document.getElementById("myTextBox").focus();
// -->
</script>

<input type="text" id="myTextBox" />
Therefore, the RegisterStartupScript() method places the <script> block at the end of the Web Form to ensure that all HTML elements in the Web Form have been declared by the time the client-side script is executed.
The RegisterClientScriptBlock() method should be used for script code that executes in response to a client-side event. The script blocks emitted by this method are emitted at the start of the Web Form since it is not imperative that the script blocks be placed after all of the HTML elements.
Examining IsStartupScriptRegistered() and IsClientScriptBlockRegistered()
In addition to the RegisterStartupScript() and RegisterClientScriptBlock() methods, the Page class contains two helper methods commonly used when emitting client-side script:
- IsStartupScriptRegistered(key)
- IsClientScriptBlockRegistered(key)
Recall that when inserting a client-side script block with either RegisterStartupScript() or RegisterClientScriptBlock(), a key is provided that uniquely identifies the script block. These methods, both of which take in a single input—a string key—and return a Boolean value, indicate whether or not a script block with the specified key has already been added to the page. Specifically, the methods return True if a script block with the specified key has already been registered, and False otherwise.
To understand the utility of these two methods, consider the ASP.NET validation Web controls RequiredFieldValidator, RegularExpressionValidator, and so on. These controls rely on a common validation JavaScript file, WebValidation.js, which is found in the aspnet_client/system_web/version_number directory of an ASP.NET Web application. Therefore, each of these controls emits an identical script block that calls the appropriate JavaScript function defined in the WebValidation.js file to start the client-side validation process. These controls accomplish this by using the Page class' RegisterClientScriptBlock() method, using the key ValidatorIncludeScript.
Next consider what happens when there are multiple validation Web controls on a single ASP.NET Web page. Each of these Web controls wants to emit an identical script block with an identical key. If the RegisterClientScriptBlock() or RegisterStartupScript() method is called twice with the same key, the second call is considered a duplicate script block and is ignored. Therefore, even with multiple validation controls on a single Web page, only one instance of the common script block will be emitted. However, realize that all of the validation Web controls other than the first one that rendered will have wasted their time in building up the common client-side script to be emitted.
This is where the IsClientScriptBlock() and IsStartupScript()methods come in handy. Rather than take the time to construct the client-side code to be emitted, the validation Web controls first check to see if there already exists a script block registered with the key ValidatorIncludeScript. If there is, then the control can bypass construction of the client-side script block, as it has already been completed by some other validation control on the page.
Therefore, whenever constructing client-side script, it is always wise to first call the IsClientScriptBlock() or IsStartupScript()method to determine if generating the client-side script is necessary. We'll see examples of using the IsClientScriptBlock() and IsStartupScript()methods in tandem with RegisterClientScriptBlock() and RegisterStartupScript() in the next section.
Emitting Client-Side Script Blocks from an ASP.NET Server Control
Keep in mind that the RegisterStartupScript() and RegisterClientScriptBlock() methods are methods of the System.Web.UI.Page class. Fortunately, it is easy to call these methods from an ASP.NET server control because the System.Web.UI.Control class, the class from which all ASP.NET server controls are either directly or indirectly derived, has a property called Page that contains a reference to the Page instance, which contains the server control. Therefore, in order to add a client-side script block from an ASP.NET server control, all you have to do is use the following syntax:
Typically adding client-side script blocks is a task handled in the OnPreRender() method, which is the method that executes during the pre-rendering stage of the control's lifecycle.
Let's create an ASP.NET server control that simply displays a client-side popup dialog box. This example will illustrate how easy it is to build a control that emits client-side script.
Start by creating a new Web Control Library project in Microsoft® Visual Studio® .NET. This will create a new project with a single class that is derived from System.Web.UI.WebControls.WebControl. However, we want to have this class derived from the System.Web.UI.Control class instead. To understand why, understand that the WebControl class was designed to support server controls that render as HTML elements, while the Control class was designed for server controls that do not result in a rendered HTML element.
Most of the built-in ASP.NET server controls emit an HTML element. For example, the TextBox Web control emits an <input> element with its type property set to text; the DataGrid Web control emits a <table> element, with <tr> elements for each record to be displayed and <td> columns for each field. However, not all server controls necessarily emit an HTML element. For example, the Literal control merely outputs its Text property as-is, without wrapping it in an HTML element. Similarly, the Repeater does not encase its output in an HTML element. Those server controls that render as an HTML element—TextBox, Button, DataGrid, and so on—are derived from the System.Web.UI.WebControls.WebControl class, whereas those controls that do not produce an HTML element—Literal, Repeater, and so on—are derived from the System.Web.UI.Control class.
Since the server control we'll be creating has no visual aspect (it merely emits a client-side script block that displays a popup control), it would be best for this control to be derived from System.Web.UI.Control as opposed to System.Web.UI.WebControls.WebControl.
This control will need only two properties:
PopupMessage—a string that indicates the message to be displayed in the popup dialog boxEnabled—a Boolean that indicates if the control is enabled or not. If the control is enabled, then the popup dialog box is displayed; otherwise, it is not displayed. (The reason we have to add anEnabledproperty is because theControlclass that we are deriving this control from does not include theEnabledproperty; this property is only present implicitly for those controls that are derived fromWebControl.)
In addition to these two properties, we need to override the OnPreRender() method. Here, we need to make a call to RegisterStartupScript(), passing in a key unique to the control and the suitable client-side script to display the popup dialog box. The complete code for this class can be seen below:
using System;
using System.Web.UI;
using System.Web.UI.WebControls;
using System.ComponentModel;

namespace ClientSideScript
{
   /// <summary>
   /// Summary description for WebCustomControl1.
   /// </summary>
   [DefaultProperty("Text"),
      ToolboxData("<{0}:PopupGreeting runat=server></{0}:PopupGreeting>")]
   public class PopupGreeting : System.Web.UI.Control
   {
      [Bindable(true),
         Category("Appearance"),
         DefaultValue("")]
      public string PopupMessage
      {
         get
         {
            // See if the item exists in the ViewState
            object popupMessage = this.ViewState["PopupMessage"];
            if (popupMessage != null)
               return this.ViewState["PopupMessage"].ToString();
            else
               return "Welcome to my Web site!";
         }

         set
         {
            // Assign the ViewState variable
            ViewState["PopupMessage"] = value;
         }
      }

      [Bindable(true),
      Category("Appearance"),
      DefaultValue("")]
      public bool Enabled
      {
         get
         {
            // See if the item exists in the ViewState
            object enabled = this.ViewState["Enabled"];
            if (enabled != null)
               return (bool) this.ViewState["Enabled"];
            else
               return true;
         }

         set
         {
            // Assign the ViewState variable
            ViewState["Enabled"] = value;
         }
      }


      protected override void OnPreRender(EventArgs e)
      {
         base.OnPreRender(e);

string scriptKey = "intoPopupMessage:" + this.UniqueID;

         if (!Page.IsStartupScriptRegistered(scriptKey) && this.Enabled &&
                      !Page.IsPostBack)
         {
            string scriptBlock =
               @"<script language=""JavaScript"">
               <!--
                  alert(""%%POPUP_MESSAGE%%"");
               // -->
               </script>";
            scriptBlock = scriptBlock.Replace("%%POPUP_MESSAGE%%", this.PopupMessage);

            Page.RegisterStartupScript(scriptKey, scriptBlock);
         }
      }
   }
}
Take note of these two things: first, the properties Enabled and PopupMessage are saved in the ViewState. This allows these values to be persisted across postbacks. Next, in the OnPreRender() method, the key used for the script block is the text intoPopupMessage: concatenated with the control's UniqueID property. If a single, hard-coded key were used, then, if there were multiple controls on the page, only the first control would be able to register its script block, so only one popup dialog box would be displayed. By using the UniqueID in the script block key, each instance of this control is guaranteed to get its script block in.
Before registering the script block, the code first checks three conditions:
- That there is not already a script registered with the same key. This should never be possible, since each control instance should have a UniqueID property value. However, it never hurts to get into the practice of using the
IsStartupScriptRegistered()method before actually taking the time to create and register the startup script. - If the control's Enabled property is True.
- If the page is not being posted back. This code has the popup dialog box only display on the page's first load. It is likely not the intention to have this popup displayed each time the page is posted back, but rather, only displayed on the first page load. A potential enhancement would be to add a Boolean property to this control to allow the user to specify if the popup dialog box should be generated on postbacks as well.
If these three conditions pass, then the script is specified and the PopupMessage property value is inserted into the script in the proper location. Finally, the Page property's RegisterStartupScript() method is called, passing in the key and script code.
The PopupGreeting code is available in a download at the end of this article. This download includes the Visual Studio .NET Solution named ClientSideControlsAndTester, which contains two projects:
- ClientSideControls, which contains the PopupGreeting server control
- ClientSideTester, which contains an ASP.NET Web application designed to test the ClientSideControls
The compiled assembly for the ClientSideControls project is named ClientSideControls.dll. To use the PopupGreeting server control in your own ASP.NET Web application, add the ClientSideControls.dll file to your Web application's References. Next, in the Designer, right-click on the Toolbox and choose Add/Remove Items . . .. Again, select the ClientSideControls.dll file. This will add a new item to the Toolbox titled PopupGreeting. You can then drag and drop the control from the Toolbox onto the Designer.
Figure 2 shows a screenshot of Visual Studio .NET after the PopupGreeting control has been added to the Toolbox and then added to the Designer. The PopupGreeting control in the Toolbox is circled in red, the PopupGreeting output in the Designer is circled in blue, and the properties of the PopupGreeting can be seen in the Properties pane in the right-hand side of the screenshot.
.gif")
Figure 2. The PopupGreeting Server Control has been added to an ASP.NET Web form page
Emitting HTML Attributes for an ASP.NET Server Web Control
Recall that there are two ways to emit client-side script through a server control:
- Through the use of client-side script blocks
- Through HTML element attributes
In the previous section we examined how to add client-side script blocks to an ASP.NET Web page using the Page class's RegisterStartupScript() and RegisterClientScriptBlock() methods. In this final section we'll see how to add HTML element attributes to the HTML element rendered by the server control.
Before we begin, realize that typically this approach will only be used for server controls that are derived from the System.Web.UI.WebControls.WebControl class, as controls derived from this class emit some HTML element. Server controls that do not emit an HTML element—like the PopupGreeting server control from the previous section—do not ever need to write out HTML element attributes because they do not write out an HTML element to begin with.
The WebControl class contains a method for adding HTML element attributes to the HTML element being emitted by the Web control. This method is called AddAttributesToRender() and has a single input parameter, an HtmlTextWriter instance. To add HTML attributes to the Web control you can use one of these two methods from the HtmlTextWriter:
- AddAttribute()
- AddStyleAttribute()
The AddAttribute() method adds an HTML attribute like title, class, style, onclick, and so on to the HTML element. AddStyleAttribute(), on the other hand, adds style settings to the HTML element, like background-color, color, font-size, and so on.
AddAttribute() has a few overloaded forms, but in the code we'll examine we'll use the following form: AddAttribute(HtmlTextWriterAttribute, value). The first parameter, HtmlTextWriterAttribute, needs to be a member from the HtmlTextWriterAttribute enumeration. This enumeration contains items like Align, Bgcolor, Class, Onclick, and so on. You can see a complete listing in the .NET Framework Class Library, HtmlTextWriterAttribute Enumeration. The value input parameter specifies the value assigned to the specified HTML attribute. Finally, if you want to add an HTML attribute that is not defined in the HtmlTextWriterAttribute enumeration, you can use an alternate form of the AddAttribute() method, AddAttribute(attributeName, value). Here, both attributeName and value are strings.
To apply this information, let's create a server Web control that renders as a confirm button. A confirm button is a submit button that, when clicked, displays a popup dialog box asking the user if they're certain they want to continue. This gives the user a chance to click Cancel, which has the effect of not submitting the form. Such functionality is particularly useful when there are buttons to delete information—nothing can be more upsetting to an end user (or Web site administrator) than to have deleted an item from a database due to an accidental and unfortunate mouse click.
To save ourselves a lot of work, we can have the ConfirmButton Web control be derived from the System.Web.UI.WebControls.Button class, since this class already does all the heavy lifting involved with rendering a submit button. All that we need to do in our derived class is add a property so that the user can specify the confirmation message, then override the Button's AddAttributesToRender() method, and then add an attribute to handle the onclick client-side event.
Start by creating a new Web Control Library project in Visual Studio .NET, or add a new Web Custom Control into the ClientSideControls project. The complete source code for the ConfirmButton class can be seen below:
using System;
using System.Web.UI;
using System.Web.UI.WebControls;
using System.ComponentModel;

namespace ClientSideControls
{
   /// <summary>
   /// Summary description for ConfirmButton.
   /// </summary>
   [DefaultProperty("Text"),
      ToolboxData("<{0}:ConfirmButton runat=server></{0}:ConfirmButton>")]
   public class ConfirmButton : Button
   {
      [Bindable(true),
         Category("Appearance"),
         DefaultValue("")]
      public string PopupMessage
      {
         get
         {
            // See if the item exists in the ViewState
            object popupMessage = this.ViewState["PopupMessage"];
            if (popupMessage != null)
               return this.ViewState["PopupMessage"].ToString();
            else
               return "Are you sure you want to continue?";
         }

         set
         {
            // Assign the ViewState variable
            ViewState["PopupMessage"] = value;
         }
      }


      protected override void AddAttributesToRender(HtmlTextWriter writer)
      {
         base.AddAttributesToRender(writer);

         string script = @"return confirm(""%%POPUP_MESSAGE%%"");";
         script = script.Replace("%%POPUP_MESSAGE%%",
            this.PopupMessage.Replace("\"", "\\\""));

         writer.AddAttribute(HtmlTextWriterAttribute.Onclick, script);
      }
   }
}
The first thing to notice is that this class, ConfirmButton, is derived from the Button class. Since the Button class already contains all the properties and methods a Button Web control uses, all we have to do is add the properties and methods to make the Button, when clicked, display a confirm dialog box. We now need one property, PopupMessage, which is the message that will display in the confirm popup dialog box. By default, this message is, "Are you sure you want to continue?" If you are using the ConfirmButton for verifying deletes, you might want to change the message to something like, "This action will permanently delete the selected item. Are you sure you want to do this?"
We only need to override a single method, AddAttributesToRender(). In this method we simply construct the client-side JavaScript to execute when the rendered <input> element's onclick event fires, and then add this via the AddAttribute() method of the passed-in HtmlTextWriter object. One thing to note in this method is that we must replace all instances of double-quotes in the PopupMessage property value with escaped double-quotes (namely, \"). Also, realize that the AddAttribute() by default HTML encodes the characters in the second parameter. That is, an ASP.NET Web page with a ConfirmButton whose PopupMessage property is set to "Do you want to continue?" will emit the following HTML markup:
<input type="submit" name="ConfirmButton1"
value="Click Me!" id="ConfirmButton1" onclick="return confirm
("Do you want to continue?");" />
If you are unfamiliar with JavaScript's confirm(string) function, it simply accepts a string parameter and displays a modal dialog box with the specified string. This dialog box contains two buttons, OK and Cancel. If OK is clicked, the confirm() function returns True, otherwise it returns False. Note that the onclick event returns the result of the confirm() function call. When a form is submitted by clicking a submit button, if the submit button's onclick event returns False, the form is not submitted. Hence, the confirm() function can be used in this manner to only submit the form if the user gives his confirmation. For more information on confirm(), see Javascript Confirm Form Submission from the ASP Warrior site.
.gif")
Figure 3. The ConfirmButton in action
While ConfirmButton uses inline JavaScript in the button's onclick event handler, another option is to create a function in a client-side script block in the ConfirmButton's OnPreRender() method, and then adjust the onclick attribute to call this function.
Conclusion
In this article we examined two methods for injecting client-side script via an ASP.NET server control. The first method is to insert client-side script blocks using the Page class's RegisterStartupScript() and RegisterClientScriptBlock() methods. The second method is to add client-side script to an HTML element's attributes. This is accomplished by overriding the Web server control's AddAttributesToRender() method, and using the HtmlTextWriter's AddAttribute() method.
We also examined in this article two simple server controls that utilize client-side script to improve their functionality. The PopupGreeting control simply displays a modal popup dialog box when the page was first loaded. Similarly, the ConfirmButton Web control prompts the user to confirm that they wish to continue when they submit a form by clicking on the button.
You can greatly improve the user's experience by inserting client-side script into your custom server controls. While the two server controls examined in this article were relatively simple and won't win any awards for usability or ingenuity, at MetaBuilders.com there is an impressive display of the capabilities that can be realized with client-side script injection from an ASP.NET server control. Specifically, at MetaBuilders.com you can find server controls that automatically add the focus to a textbox, move items between two drop-down lists, add and remove items from a drop-down list, display parent-child related data in a series of drop-down lists, and on and on. Best of all, these controls are free and include the complete source code.
Happy Programming!
About the Author
Scott Mitchell, author of five ASP/ASP.NET books and founder of 4GuysFromRolla.com, has been working with Microsoft Web technologies for the past five years. An active member in the ASP and ASP.NET community, Scott is passionate about ASP and ASP.NET and enjoys helping others learn more about these exciting technologies. For more on the DataGrid, DataList, and Repeater controls, check out Scott's book ASP.NET Data Web Controls Kick Start (ISBN: 0672325012).
Recommended Links:
- MetaBuilders.com Client-Side Web Controls
- .NET Framework Class Library, Page.RegisterClientScriptBlock Method Technical Documentation
- .NET Framework Class Library, Page.RegisterStartupScript Method Technical Documentation
- Visual Studio Magazine, Implement Client Scripts
- The Building Controls Forum at the ASP.NET Forums